使用go语言开发微信公众号 接入ChatGpt
github上有给我们封装好的包
go get github.com/sashabaranov/go-openai
然后直接复制示例
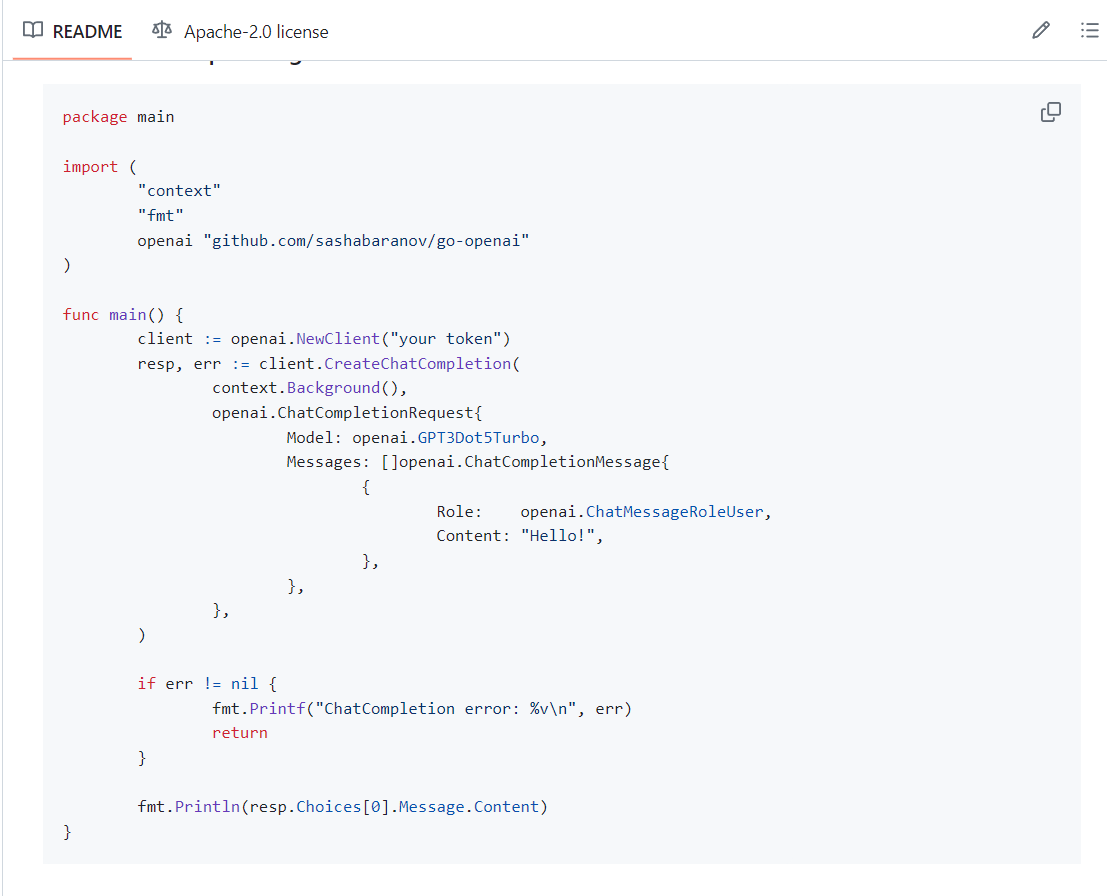
然后因为我是要接入微信公众号 所以主要需要线上环境中测试通过
上传Linux打包
上传Linux这个方式很多不多说了 上传成功后
go mod tidygo build
然后 ./main 发现报错timeout 因为openai是国外的 我们需要设置代理
安装Clash
这里前往https://github.com/Loyalsoldier/clash-rules?tab=readme-ov-file
我们选择官方版
 我是amd64位架构Centos 下载这个版本
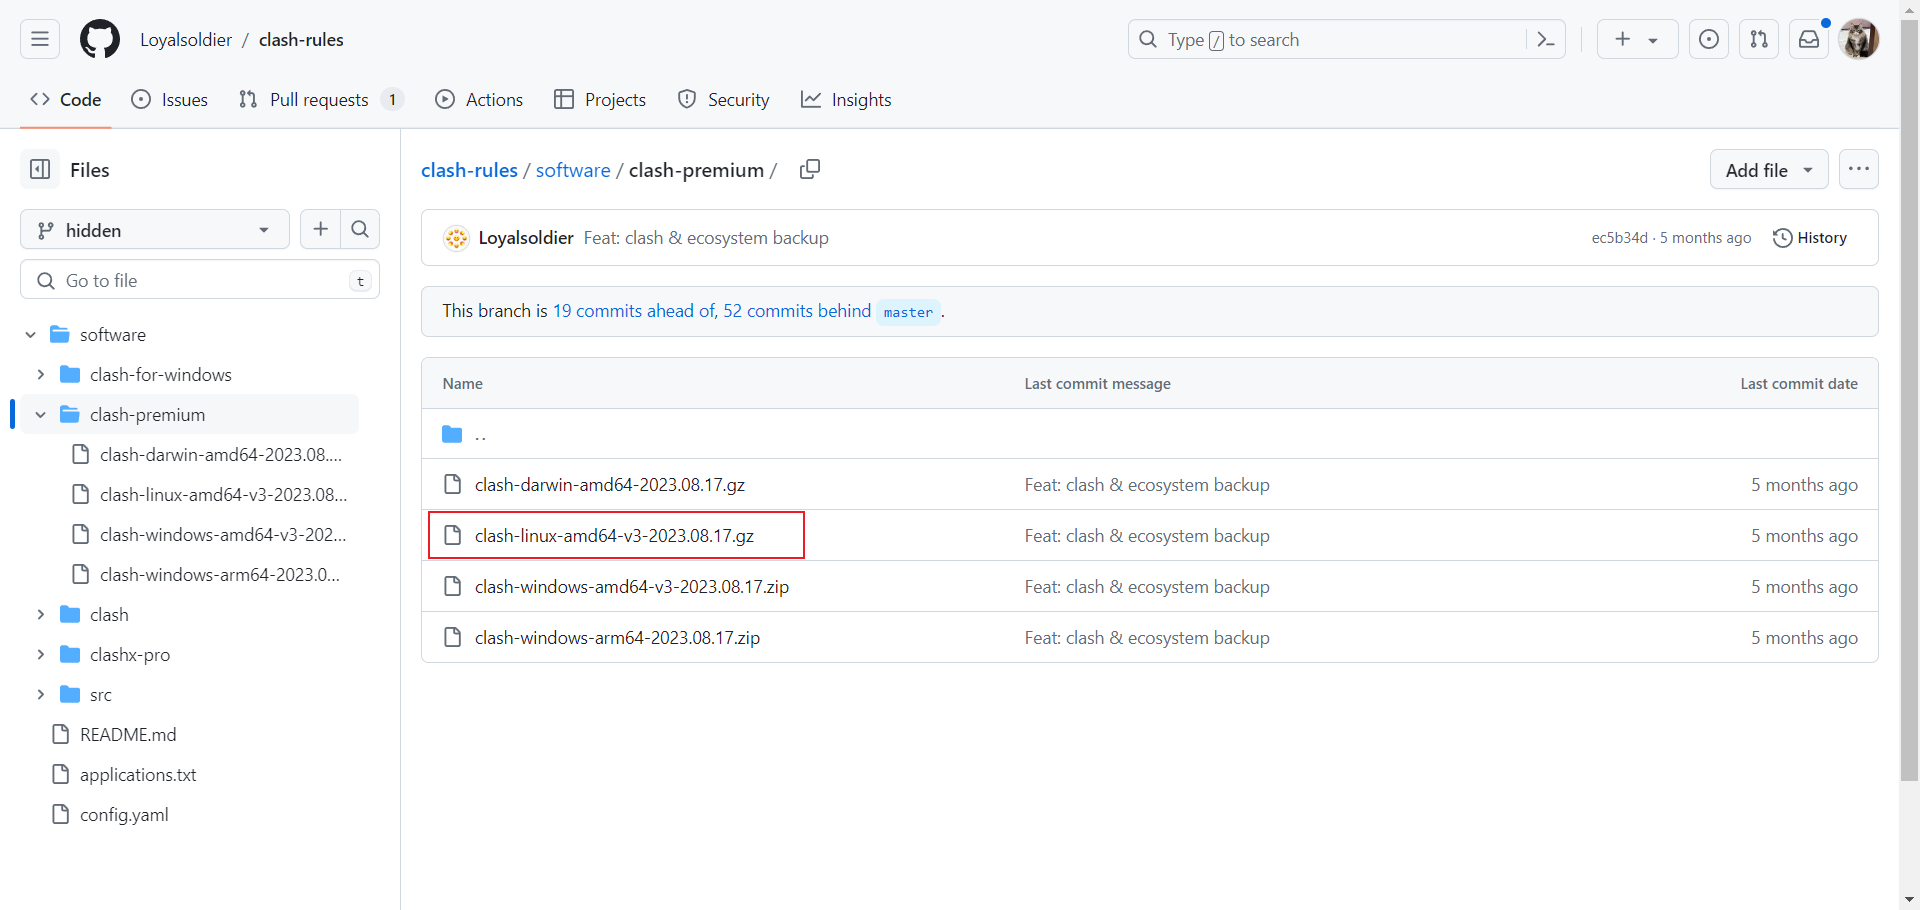
然后 解压并给予权限
gunzip clash-linux-amd64-v3-2023.08.17.gzmv clash-linux-amd64-v3-2023.08.17 clashchmod u+x clash
配置文件
配置文件使用
curl -o config.yaml 'longURL'//对于 suo.yt 短链接,需要重定向,因此使用以下命令来下载配置文件:curl -L -o config.yaml 'shortURL'
我是用的是一元机场 没有直接对于linux的支持 下载下来的是一段密文
所以我使用Windows使用的配置
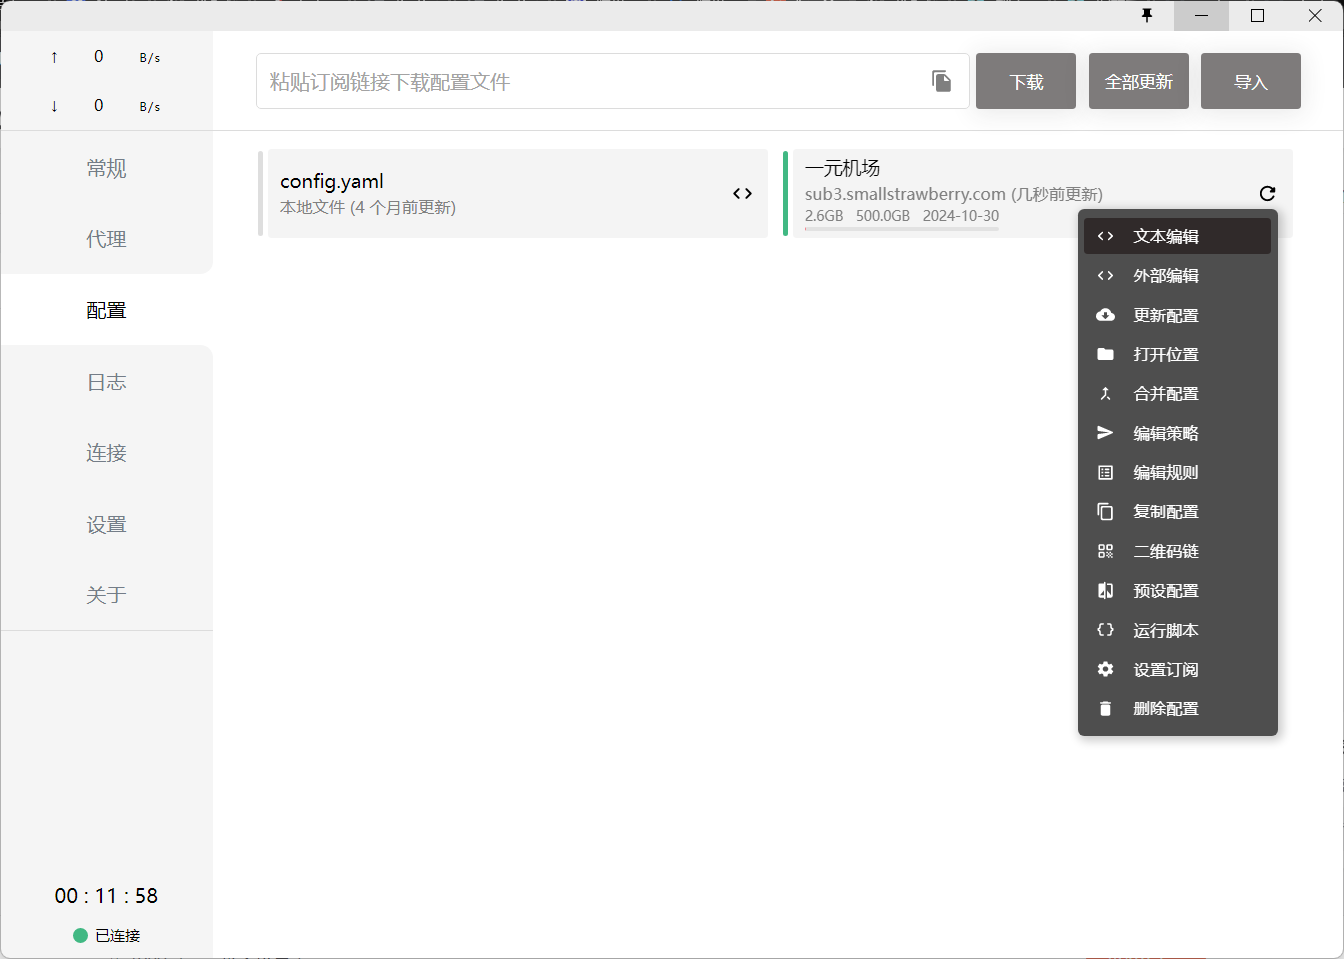 复制其中的内容 粘贴到linux的config.yaml中
下载Country.mmdb
https://github.com/Dreamacro/maxmind-geoip/releases
配置 systemd 服务
sudo mkdir /etc/clashsudo cp clash /usr/local/binsudo cp config.yaml /etc/clash/sudo cp Country.mmdb /etc/clash/
创建 systemd 服务配置文件 sudo vim /etc/systemd/system/clash.service
[Unit]Description=Clash daemon, A rule-based proxy in Go.After=network.target[Service]Type=simpleRestart=alwaysExecStart=/usr/local/bin/clash -d /etc/clash[Install]WantedBy=multi-user.target
使用 systemctl
使用以下命令,让 Clash 开机自启动:
sudo systemctl enable clash
然后开启 Clash:
sudo systemctl start clash
查看 Clash 日志:
sudo systemctl status clashsudo journalctl -xe
利用 Export 命令使用代理
Clash 运行后,其在后台监听某一端口。Ubuntu 下使用代理,需要 export 命令。根据 config 配置文可以查看到件Clash 代理端口(订阅转换后,端口为7890),设置系统代理命令为:
export https_proxy=http://127.0.0.1:7890 http_proxy=http://127.0.0.1:7890 all_proxy=socks5://127.0.0.1:7890可以将该命令添加到 .bashrc 中,登陆后该用户自动开启代理。
取消系统代理:
unset http_proxy https_proxy all_proxy
这时测试
curl www.api.openai.com
发现成功了
 再运行我们的demo

然后我使用的一元机场就不是很好用
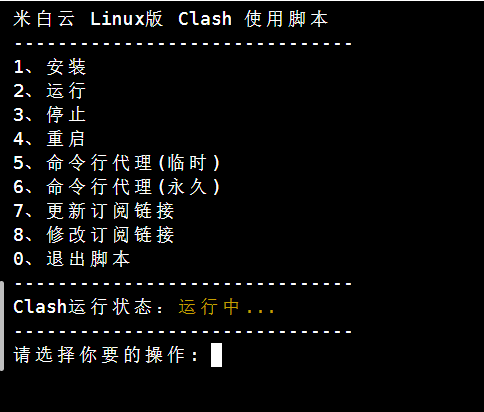
时不时要测速换节点 这里可以安装可视化界面或者使用下面脚本 以及香港的ip同样不能访问chatgpt
https://raw.githubusercontent.com/freessir/blog/master/post/clash-for-linux/setup_clash.sh
集成demo到wechat项目中
在微信公众平台申请公众号以后
需要打开开发者选项
然后启动服务器配置
 注意!你配置的这个路径 微信服务器将发送GET请求到填写的服务器地址URL上
开发者通过检验signature对请求进行校验(下面有校验方式)。若确认此次GET请求来自微信服务器,请原样返回echostr参数内容,则接入生效,成为开发者成功,否则接入失败。加密/校验流程如下:
1)将token、timestamp、nonce三个参数进行字典序排序
2)将三个参数字符串拼接成一个字符串进行sha1加密
3)开发者获得加密后的字符串可与signature对比,标识该请求来源于微信
Go语言示例
r.GET("/v1", func(c *gin.Context) {signature := c.Query("signature")timestamp := c.Query("timestamp")nonce := c.Query("nonce")echostr := c.Query("echostr")token := global.Tokenstrs := sort.StringSlice{token, timestamp, nonce} // 使用本地的token生成校验sort.Strings(strs)str := ""for _, s := range strs {str += s}h := sha1.New()h.Write([]byte(str))hashcode := fmt.Sprintf("%x", h.Sum(nil))if signature == hashcode {c.Writer.WriteString(echostr)} else {c.Writer.WriteString("error")}})
然后你设定的这个url的post请求就是消息的处理路由 使用github的第三方包 https://github.com/silenceper/wechat
go get github.com/silenceper/wechat/v2
官方文档 这里主要介绍实现chatgpt接入 其他内容请先自行研究 https://silenceper.com/wechat/
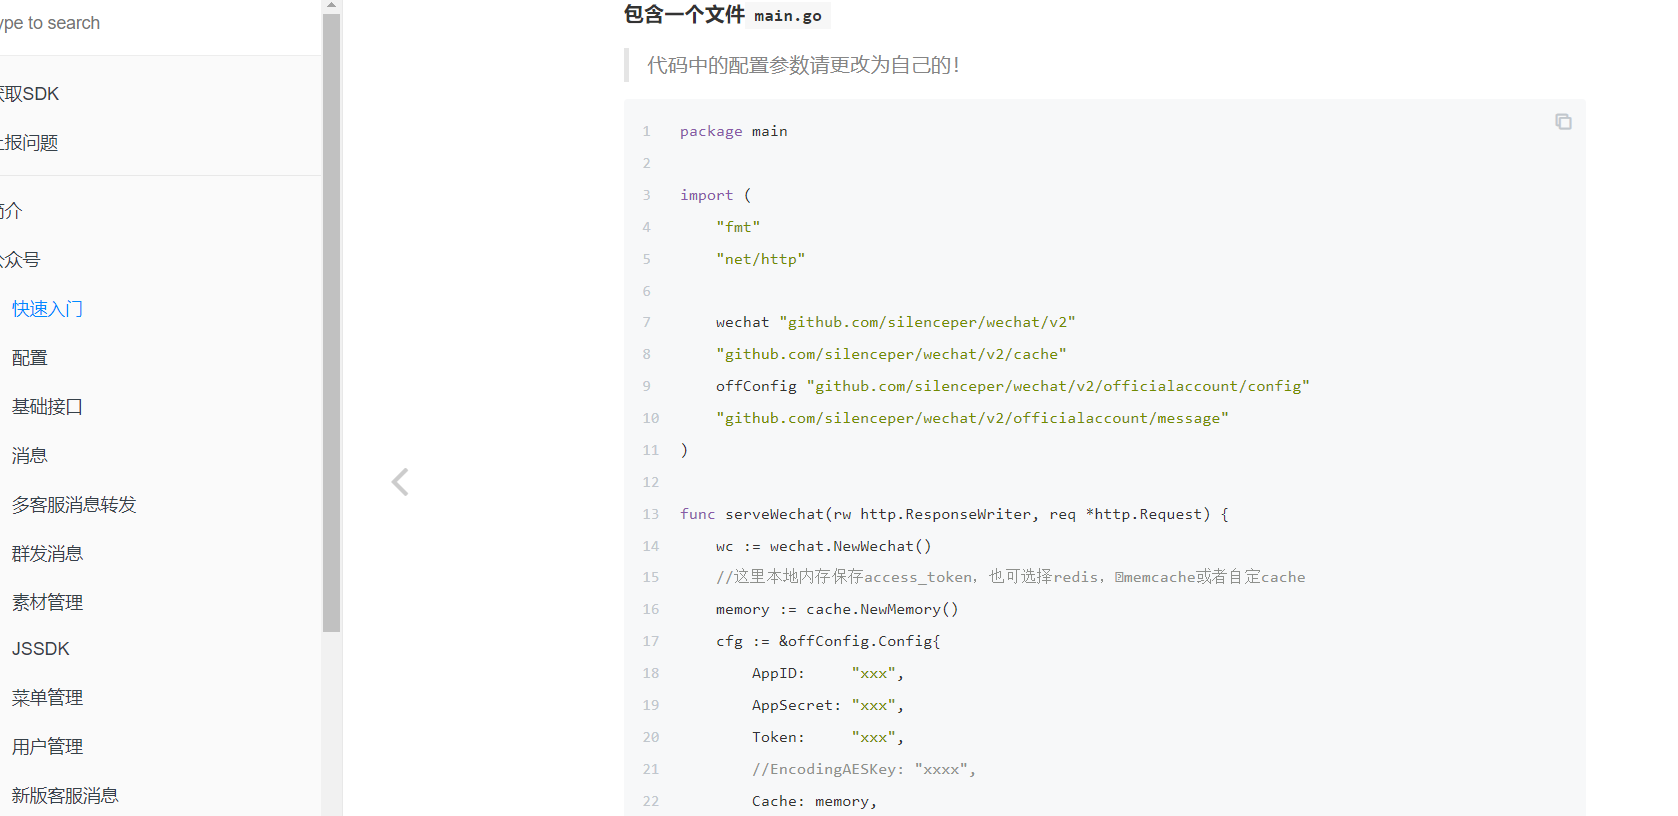
复制快速示例中的例子
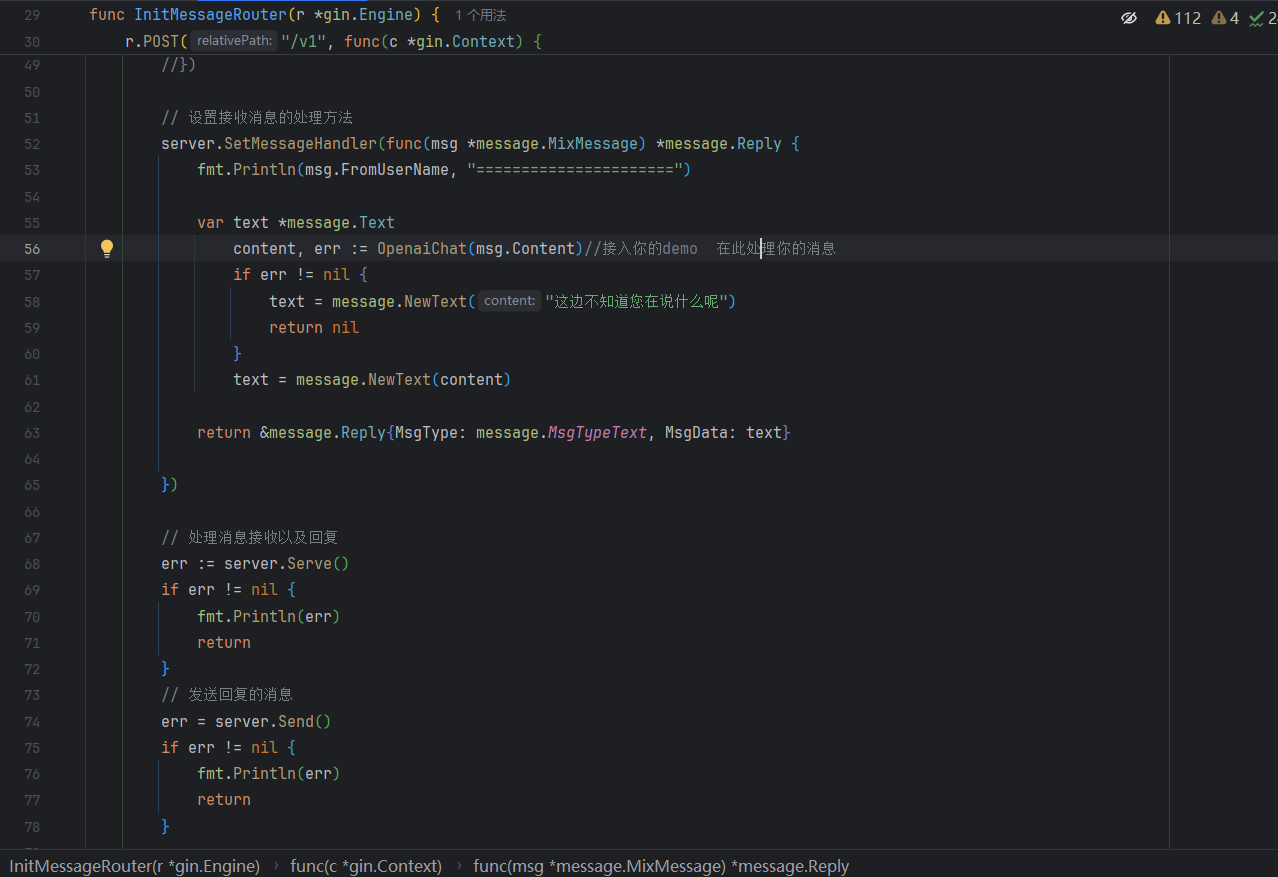
然后将chatgpt的demo入口函数修改一下 在处理消息处调用
 放在线上运行
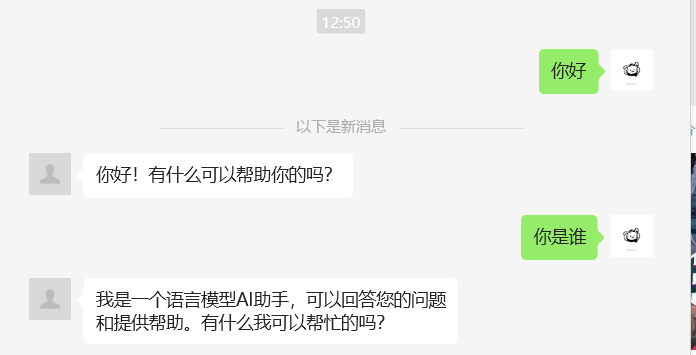
成功
